Blog de manualidades
Inicio " Blog de manualidades " ¿Cómo hacer marcapáginas magnéticos?
¿Cómo hacer marcapáginas magnéticos?
Índice
En la era digital, muchas personas siguen apreciando la calidez irremplazable de los libros físicos. Ya seas un ávido lector de novelas, un estudiante diligente que toma apuntes académicos o un lector ocasional que disfruta hojeando revistas en su tiempo libre, hay un problema común que siempre preocupa a los amantes de los libros: perder el progreso de la lectura. El papel tradicional favoritos se salen fácilmente de las páginas, los marcapáginas de cartón fino pueden doblarse y dañarse tras un uso repetido, y los voluminosos marcapáginas de cuero pueden dejar arrugas en el delicado papel de los libros. En tales circunstancias, magnético Los marcapáginas se han convertido poco a poco en uno de los accesorios de lectura más populares entre los lectores modernos.
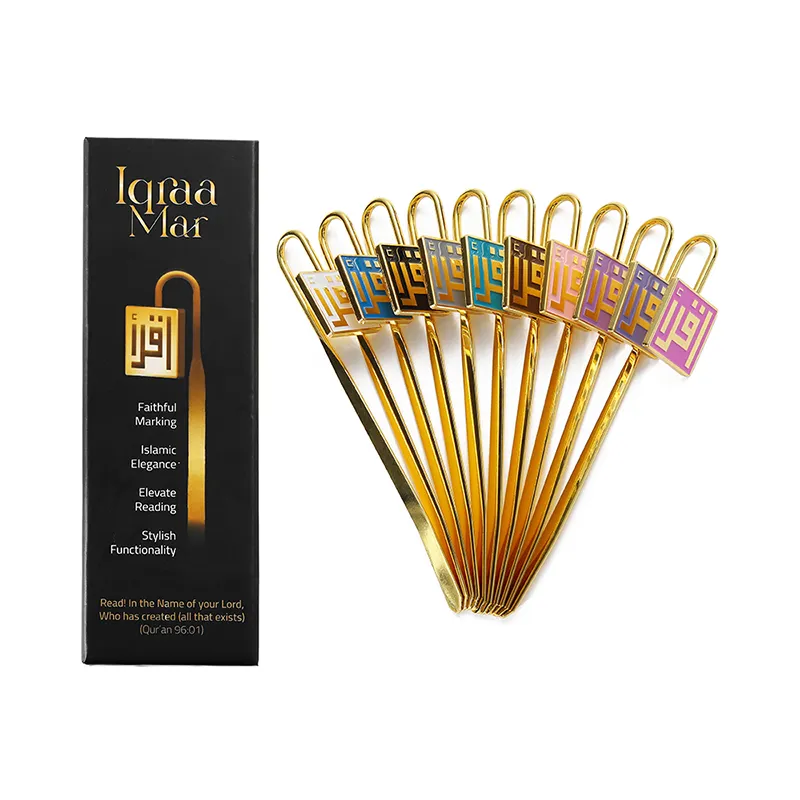
Los marcapáginas magnéticos son ligeros, duraderos y se fijan firmemente a las páginas de los libros sin resbalar ni dejar muescas. A diferencia de los marcapáginas normales, que sólo pueden marcar una página, los magnéticos sujetan firmemente la página con dos pequeños imanes, lo que los hace perfectos para libros de tapa dura, novelas de bolsillo, libros de texto e incluso diarios gruesos. Además, los marcapáginas magnéticos que se compran en las tiendas suelen tener un precio excesivo y diseños monótonos, y es difícil encontrar estilos personalizados que se ajusten a tus preferencias estéticas. Por lo tanto, aprender a hacer marcapáginas magnéticos a mano es un proyecto de manualidades asequible, creativo y muy gratificante.
¿Por qué elegir marcapáginas magnéticos caseros?
1. Excelente practicidad
Los marcapáginas magnéticos adoptan una estructura de sujeción de doble cara. Un par de pequeños imanes se adhieren firmemente a la página del libro en el centro, por lo que no se caen aunque se sacuda el libro o se coloque en una mochila. En comparación con los marcapáginas de papel, fáciles de perder, y los marcapáginas de cinta, fáciles de enredar, los marcapáginas magnéticos tienen mayor estabilidad. Son ultrafinos y no abultan el lomo del libro, protegiendo eficazmente la encuadernación y el papel de los libros. Para los lectores que llevan libros a menudo para estudiar o viajar, los marcapáginas magnéticos son sin duda la herramienta de lectura más portátil y práctica.
2. Creatividad personalizada ilimitada
Los marcapáginas magnéticos comerciales están limitados por la producción en serie, con diseños únicos y tamaños fijos. Al hacer marcapáginas a mano, puede personalizar libremente cada detalle según sus aficiones. Puede elegir sus colores favoritos, dibujos animados patrones, elementos vegetales, citas literarias, o incluso pegar fotos personales y pinturas dibujadas a mano en los marcapáginas. Tanto si prefiere un estilo minimalista, como un simpático estilo de dibujos animados, un estilo literario retro o un estilo estético romántico, puede materializar perfectamente sus ideas de diseño mediante la producción artesanal.
3. Bajo coste y protección del medio ambiente
Las materias primas necesarias para hacer marcapáginas magnéticos son baratas y fáciles de conseguir. La mayoría de los materiales pueden adquirirse en papelerías, tiendas de manualidades o plataformas de compra en línea a bajo precio. Con un juego de materiales básicos se pueden hacer más de una docena de marcapáginas, y el coste medio de un solo marcapáginas es muy inferior al de los productos acabados en las librerías. Además, los marcapáginas hechos a mano pueden aprovechar al máximo materiales de desecho como restos de papel de colores, cintas rotas y pegatinas ociosas, lo que se ajusta al concepto de protección medioambiental y aprovechamiento de residuos.
4. Regalos significativos hechos a mano
En una era de consumo rápido, los artículos hechos a mano son especialmente preciados. Un marcapáginas magnético hecho con esmero no es sólo un accesorio de lectura, sino también un delicado regalo. Puede hacer marcapáginas exclusivos para sus amigos, compañeros de clase, profesores y familiares en cumpleaños, festivales o días normales. Cada proceso de corte, pegado y decoración contiene su corazón, y estos regalos únicos son más conmovedores que los caros productos fabricados en serie.
Materiales y herramientas básicos necesarios
Antes de iniciar la producción, es necesario preparar materiales y herramientas completos. Todos los artículos que se enumeran a continuación son materiales de artesanía comunes sin equipamiento complicado. Puede ajustar los materiales adecuadamente según su estilo preferido y la dificultad de producción. A continuación se ofrece una clasificación detallada de los materiales para principiantes.
1. Materiales funcionales básicos
- Pequeños imanes de neodimio: Es el material más importante para hacer marcapáginas magnéticos. Se recomienda elegir imanes pequeños ultrafinos, circulares o cuadrados, con un grosor de 1 mm a 2 mm. El diámetro del imán debe controlarse entre 8 mm y 12 mm. Estos imanes tienen una gran fuerza de adsorción, no son fáciles de desmagnetizar y no aumentan el grosor del marcapáginas. Evite el uso de imanes de hierro ordinarios voluminosos, que endurecerán el marcapáginas y dañarán las páginas del libro.
- Base Papel o Plástico: La base determina la dureza y durabilidad del marcapáginas. Las mejores opciones son el papel estucado de 200 a 300 g/m² de grosor, el papel kraft o las láminas de plástico mate. El papel grueso no se dobla fácilmente, y las láminas de plástico son más resistentes al agua. Los principiantes pueden empezar con cartón grueso, que es fácil de cortar y procesar.
2. Materiales decorativos
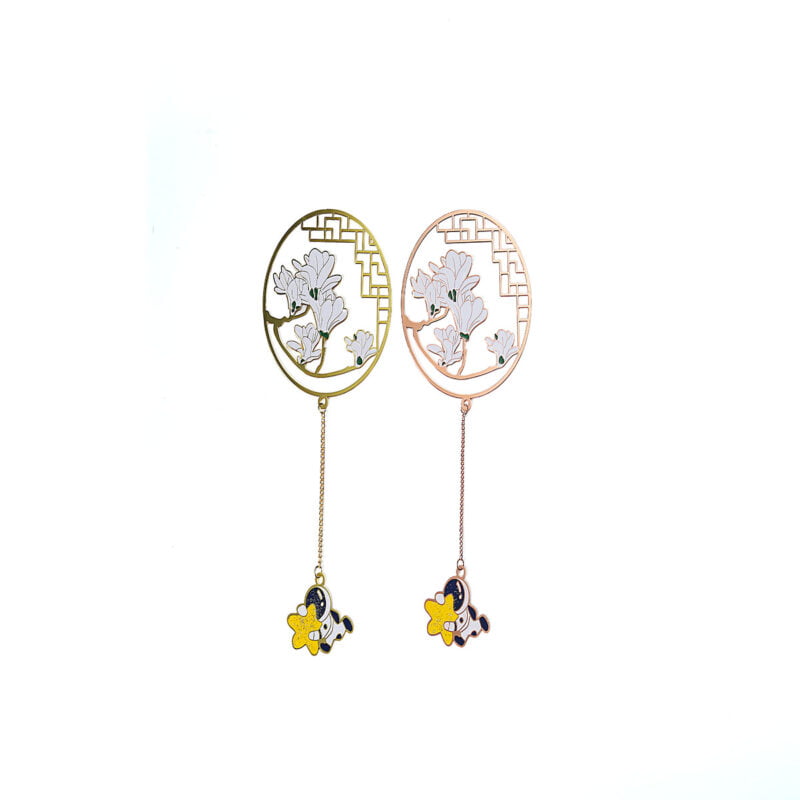
- Papeles decorativos: El papel washi, el papel de colores estampado, el periódico antiguo retro y el papel artístico degradado se pueden utilizar para pegar la superficie de los marcapáginas y enriquecer el efecto visual.
- Pegatinas y calcomanías: Las pegatinas de dibujos animados, las pegatinas de plantas, las pegatinas de láminas doradas y las pegatinas del alfabeto son adecuadas para una decoración sencilla, que puede mejorar rápidamente la delicadeza de los marcapáginas sin necesidad de pintarlos a mano.
- Accesorios: Se pueden añadir cintas finas, flores secas, purpurina en polvo, lentejuelas nacaradas y encajes como adornos auxiliares para crear una sensación de capas tridimensionales.
3. Herramientas de producción
- Herramientas de corte: El cuchillo artístico de precisión y la regla de acero inoxidable se utilizan para cortar formas regulares de marcapáginas. Tijeras pequeñas son adecuados para el corte de bordes curvos y patrones irregulares, que es más seguro para los operadores novatos.
- Adhesivos: La cinta adhesiva transparente de doble cara y el pegamento sólido son los adhesivos más utilizados. La cinta de doble cara tiene una viscosidad fuerte y no deja marcas de agua, por lo que no arruga el papel. El pegamento líquido es adecuado para pegar flores secas y accesorios ligeros.
- Materiales de protección de superficies: La película de laminación transparente autoadhesiva puede sellar la superficie de los marcapáginas, impermeabilizarlos y antiincrustarlos, y prolongar eficazmente su vida útil.
Tutorial paso a paso: Cómo hacer marcapáginas magnéticos clásicos
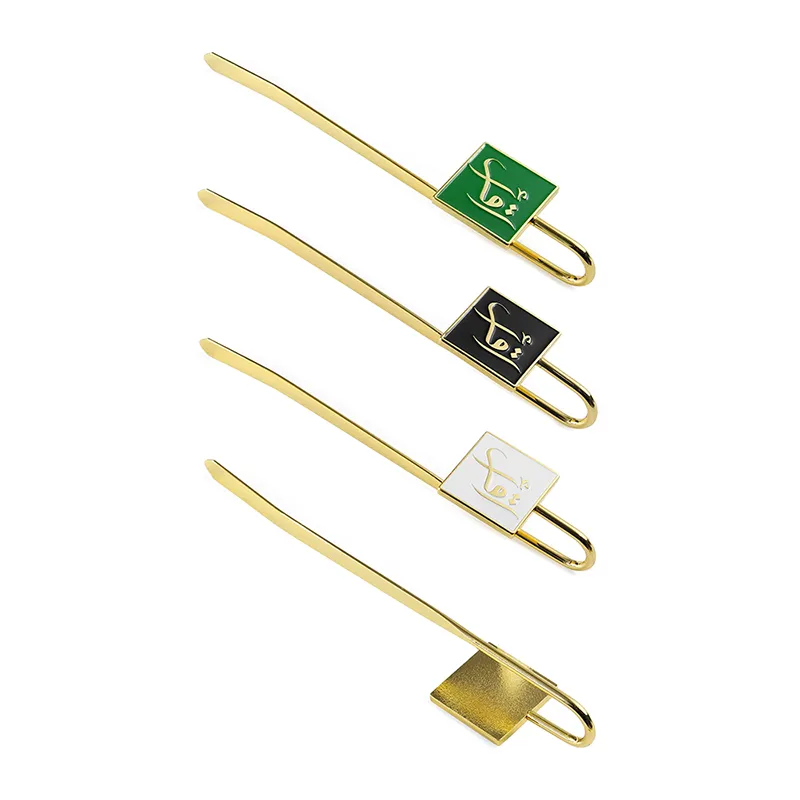
Este tutorial toma como ejemplo el marcapáginas magnético rectangular más versátil. Los pasos de funcionamiento son sencillos, la dificultad es baja y es adecuado para todos los principiantes. Después de dominar el método básico de producción, puede cambiar libremente la forma y el estilo de decoración. El tamaño estándar del marcapáginas acabado es de 5 cm de ancho y 15 cm de alto, compatible con la mayoría de los libros.
Paso 1: Diseñar y cortar la base del marcapáginas
En primer lugar, coloca el papel de base grueso sobre una alfombrilla de corte plana. Utiliza una regla y un lápiz para dibujar dos rectángulos idénticos de 5 cm×15 cm en el papel. Estos dos rectángulos son los sustratos delantero y trasero del marcapáginas, que envolverán los imanes en el centro. Cuando dibujes las líneas, mantén los bordes rectos para evitar formas irregulares. A continuación, fija el papel con un pisapapeles para evitar que se deslice, y corta a lo largo de la línea de lápiz con un cuchillo de arte o unas tijeras. Después de cortar, pule las cuatro esquinas del papel con unas tijeras para hacer esquinas redondeadas, que pueden evitar que las esquinas afiladas rayen las páginas del libro y los dedos.
Paso 2: Pegar capas decorativas
Selecciona tu papel decorativo favorito, córtalo del mismo tamaño que el papel base y cubre la superficie de los dos sustratos de cartón. El papel washi y el papel artístico mate son las mejores opciones para los principiantes por su grosor moderado y su bonita textura. Arranca el reverso de la cinta adhesiva de doble cara, pega uniformemente el papel decorativo sobre el cartón base y presiona suavemente con los dedos desde el centro hacia los bordes para eliminar las burbujas de aire. Asegúrate de que el papel quede plano, sin arrugas ni inclinaciones. Si le gustan los estilos minimalistas, puede omitir este paso y utilizar directamente el papel de base liso para la producción posterior.
Paso 3: Fijar los imanes en posiciones simétricas
Este es el paso fundamental para hacer marcapáginas magnéticos. En primer lugar, determine la posición de sujeción del imán. Se recomienda colocar el imán en la parte superior central del marcapáginas, a 3 cm del borde superior, lo que resulta conveniente para sujetar la parte superior de la página del libro sin bloquear la línea de lectura. Arranca un trocito de cinta adhesiva de doble cara, pega un imán en la cara interior de la primera cartulina y, a continuación, coge otro imán para adsorberlo de forma natural. Alinee la segunda cartulina con la primera, de modo que los dos imanes queden completamente simétricos y adsorbidos juntos. Presione el cartón con fuerza para que los imanes no se desplacen. Está terminantemente prohibido invertir los polos de los imanes, de lo contrario los dos imanes se repelerán y no podrán sujetar la página del libro.
Paso 4: Pegar el cartón de doble capa
Después de fijar los imanes, aplica cinta adhesiva de doble cara uniformemente en el borde de los lados interiores de los dos trozos de cartón. No dejes huecos en los cuatro lados para evitar que entre polvo y se deslicen los imanes. Alinea con precisión los bordes superior e inferior de los dos cartones y encájalos lentamente. Utiliza una regla para raspar la superficie de un lado a otro para que la unión sea más firme. En este momento, se ha completado la estructura básica del marcapáginas magnético. Puedes separar suavemente la parte inferior del marcapáginas para comprobar la fuerza de adsorción de los imanes. Si la sujeción es firme sin aflojarse, significa que la producción está cualificada.
Paso 5: Decoración fina y sellado de la superficie
Realiza una decoración personalizada en la superficie del marcapáginas. Puedes pegar bonitas pegatinas, dibujar motivos pintados a mano, escribir citas inspiradoras con un rotulador de gel o incrustar flores secas y lazos. Para los marcapáginas de estilo retro, puedes untar una pequeña cantidad de tinte de café en la superficie del papel para crear una textura antigua. Una vez terminada la decoración y completamente seco el pegamento, pega una capa de film transparente autoadhesivo de laminación a ambos lados del marcapáginas. Recorta el exceso de película a lo largo del borde para que la superficie quede lisa e impermeable. La película de laminación también puede evitar que las pegatinas decorativas se caigan y evitar arañazos en la superficie durante un uso prolongado.
Ideas creativas de diseño de marcapáginas magnéticos para diferentes estilos
Después de dominar los pasos básicos de producción, puede romper la limitación rectangular y probar diseños creativos diversificados. Los siguientes cuatro estilos populares son adecuados para principiantes en la fabricación a mano, con métodos de decoración sencillos y efectos estéticos extraordinarios.
1. Estilo literario minimalista
Utiliza papel kraft de color sólido, papel mate de color crema y papel normal gris claro como base. No utilices pegatinas extravagantes. Simplemente imprime o escribe a mano citas clásicas de libros, líneas minimalistas y pequeños trazos vegetales en la superficie. Combínalo con cintas finas de color beige para decorar los bordes. Este estilo es discreto y elegante, adecuado para libros literarios, colecciones de poesía y libros de texto académicos. No causará fatiga visual durante la lectura prolongada.
2. Estilo de dibujos animados
Elige papel de colores vivos, como rosa, azul claro y amarillo tierno. Pega pegatinas de animales de dibujos animados, calcomanías de personajes de anime y lentejuelas brillantes de color caramelo. Recorta el marcapáginas con formas irregulares, como nubes, hojas y corazones. Añade pequeñas borlas en la parte inferior del marcapáginas. A los adolescentes y los niños les encanta este estilo, muy adecuado para novelas, libros ilustrados y material de lectura extraescolar.
3. Estilo de foto personalizado
Imprime minifotos de mascotas, retratos familiares, paisajes de viajes o fotogramas de tus películas favoritas en trozos pequeños que se ajusten al tamaño del marcapáginas. Pega las fotos en el papel de base y séllalas con film de plastificación. En personalizado El marcapáginas con foto lleva recuerdos personales únicos, que son muy conmemorativos y pueden hacer que la lectura sea más cálida.

Errores comunes y consejos útiles para principiantes
1. Evitar la colocación incorrecta del imán
Muchos novatos cometen el error de invertir los polos de los imanes. Antes de pegar los imanes, hay que adsorberlos juntos para confirmar los polos positivo y negativo. No los pegue por separado, de lo contrario los imanes se repelerán y no podrán sujetar las páginas. Además, no coloque los imanes en la parte inferior del marcapáginas; la posición media superior es el punto de sujeción más científico.
2. Control del grosor de las materias primas
No utilices cartón demasiado grueso (más de 350 g/m²). Los marcapáginas demasiado gruesos abultarán el lomo del libro y dañarán la encuadernación. Tampoco se recomienda utilizar demasiados adornos tridimensionales, como purpurina gruesa y accesorios metálicos pesados, que debilitarán la fuerza de adsorción magnética y afectarán al efecto de sujeción.
3. Evitar las arrugas del papel
Cuando pegue papel decorativo y cinta adhesiva de doble cara, hágalo lentamente de un lado a otro. No presione al azar, ya que es fácil que se produzcan burbujas de aire y arrugas. Si aparecen burbujas de aire, puede pincharlas suavemente con una aguja fina y luego aplanar la superficie del papel.
4. Habilidades de mantenimiento diario
El marcapáginas magnético acabado debe evitar la exposición prolongada a altas temperaturas y ambientes húmedos para evitar la desmagnetización del imán y el enmohecimiento del papel. No tire violentamente de los dos lados del marcapáginas para evitar que se desgrane el adhesivo. Al limpiarlo, limpie suavemente la superficie con un pañuelo de papel seco; no lo sumerja en agua aunque esté plastificado.
Conclusión
Hacer marcapáginas magnéticos es una actividad artesanal sencilla, relajante e interesante. No requiere tecnología profesional ni equipos caros. Con materias primas baratas y un poco de paciencia, todo el mundo puede crear marcapáginas exquisitos y prácticos. A diferencia de los monótonos productos acabados del mercado, los marcapáginas magnéticos hechos a mano integran la estética personal y las ideas creativas. Cada marcapáginas es una obra de arte única.
En el proceso de cortar, pegar y decorar, puedes dejar a un lado la presión del estudio y el trabajo, tranquilizarte para disfrutar de la diversión de la producción artesanal y aliviar la ansiedad y el cansancio. Ya sea para uso personal o como regalo para familiares y amigos, los marcapáginas magnéticos tienen un valor práctico y un significado emocional insustituibles. Para los amantes de los libros, un delicado marcapáginas magnético no es sólo una herramienta para registrar el progreso de la lectura, sino también un pequeño ritual en la vida lectora.
Ahora ya domina todos los métodos de producción y las habilidades creativas de los marcapáginas magnéticos. Es hora de preparar las materias primas y comenzar su viaje artesanal. Pruebe diferentes combinaciones de colores y estilos de decoración, cree marcapáginas magnéticos exclusivos que le pertenezcan y añada una sensación única de ritual a cada momento de lectura. Que cada lector encuentre paz y felicidad entre las páginas de los libros, y que estos pequeños marcapáginas hechos a mano le acompañen en cada hermoso momento de lectura.
CATEGORÍAS DE PRODUCTOS
¿Quiere tener una artesanía en metal única?
Conectemos cuanto antes.
Somos fabricantes profesionales de artesanía metálica personalizada, podemos crear exquisitas obras de arte en metal para usted según sus necesidades y preferencias.